Make Music Online in Realtime with a Jamulus Server
#cloud-computing #jamulus #music #azure 
Got the Lockdown Blues, But No One to Play Them With?
Jamulus to the rescue! Jamulus is an open-source program for playing music online with latencies of under 50 milliseconds.
To use Jamulus, you generally just need two steps:
- Ensure you have a low latency audio driver installed and install one if you don’t
- Install the Jamulus client
See this how-to for a detailed description for Windows/Mac/Linux.
Once Jamulus is up and running, you just click connect to see a list of all the public servers around the world and their latencies.
And once you’re in, you’re live! That’s it, end of story.
You Don’t Want to Mooch Someone Else’s Server?
Well, that’s where this blog post will help you out. In the steps below, I will explain how to make your very own Jamulus server that can either be private, for only you and your friends, or public, for all the world (or at least those with low enough ping times) to benefit from. And the best thing is, by hosting it on Microsoft Azure, it will be completely free! Or at least for one year, and about 15€ a month thereafter if you keep it running.
It’s four moderately easy steps. Let’s go!
Step 1: Create an Azure Account
Sign up for a Microsoft Azure account so you can create a virtual linux computer (the server).
Navigate to azure.microsoft.com and set up an account. You will need a credit card, because after the 12 month free trial, they will charge you if your server is still running. As a starting present, they give you 170€ of free credit!
You’re all signed up? Move on to step 2:
Step 2: Create a Virtual Linux Server
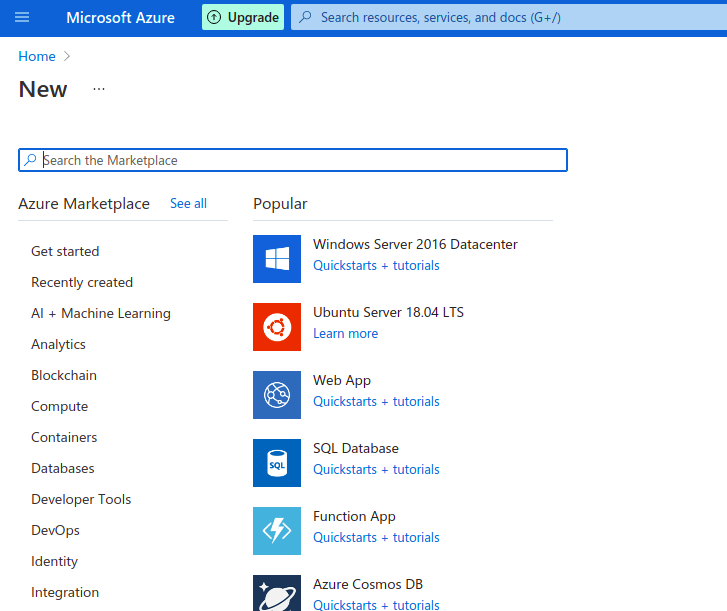
Navigate to portal.azure.com to get to your Microsoft Azure dashboard. Here you can see all the Microsoft resources you have booked (right now zero), and can also press the big plus sign button in the upper left to create new resources. So do it! And you will see the following:
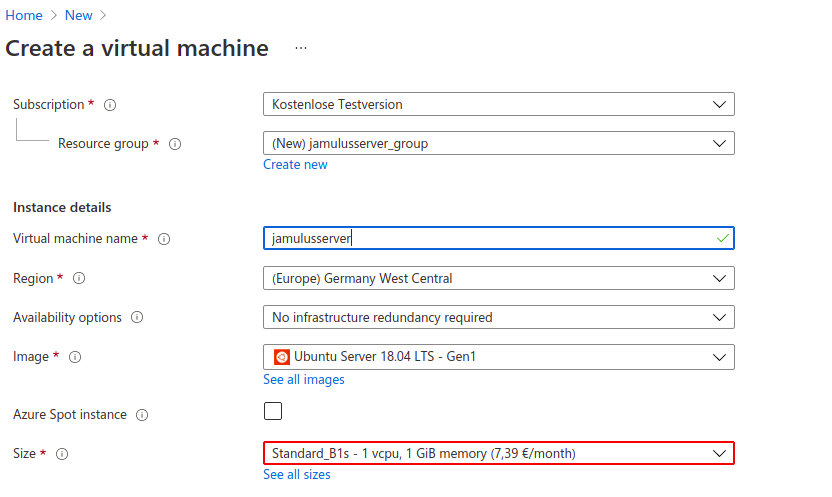
So click on Ubuntu Server, and next you’ll be asked to enter details about your server’s name, size, region, etc.
So call your server jamulusserver (or whatever you want), choose the region nearest to you, and selec the CPU size Standard_B1s as listed in the picture below.
A bit below the size field, you will find some fields about SSH. SSH is a kind of key you will need to access the command line of your cloud computer from your local computer (don’t worry, we barely need to do anything in the command line).
In the field Key Pair Name call your key jamulus SSH key (or whatever you want). At the end of the creation process, you will download this key file, and you better be sure you dont lose it, because if you do, it will be impossible to access your server and you’ll have to make a new one.
Do not edit any other fields, and instead, click in the bottom left corner the blue Review + Create button, which if you did everything right, will take you to this screen:
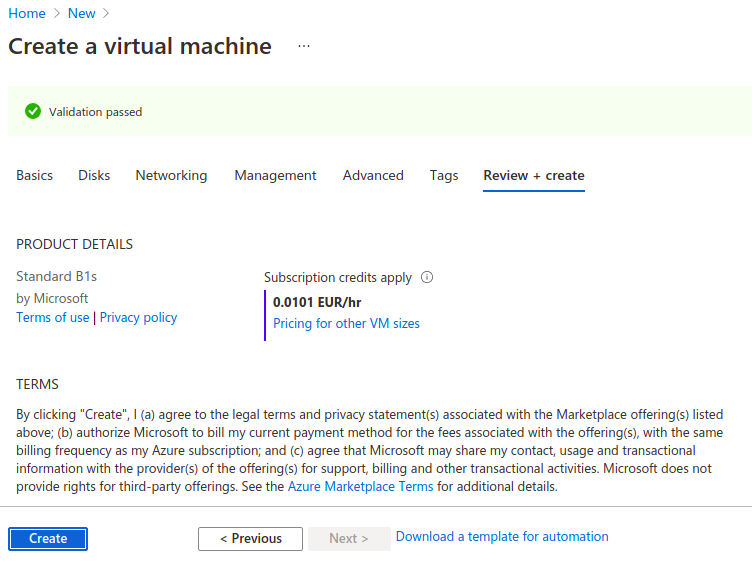
Press create, and then wait a few minutes for the Linux machine to be created.
You have now created your Linux machine.
Step 3: Open Jamulus Ports
You have a Linux computer in the cloud now. Congrats. The next step before we actually install Jamulus on it, is to make sure Jamulus users will have access to your Linux computer. To do this, we need to open the “ports” that Jamulus uses so that anyone can access them. Here’s how it works:
You just need one change. In the left side bar of portal.azure.com, you should see home. Go there, and find the virtual machine by the name you created, and click on it.
Once you’re on the screen for your virtual machine, look again in the left side bar and click on Networking. It should look like this:
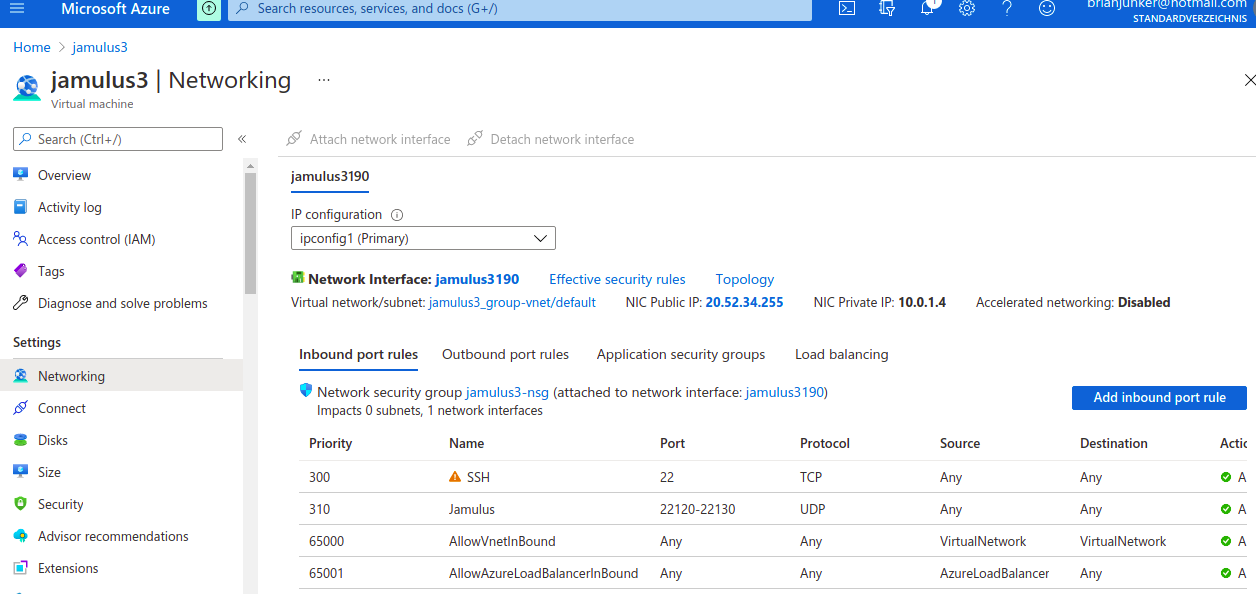
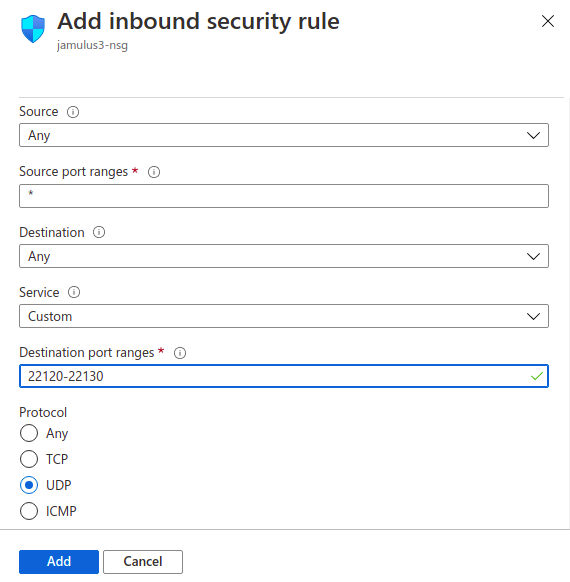
On the right hand side, click add inbound port rule, and the screen below will pop up. Leave all settings as-is, except destination port ranges and protocol. In destination port ranges, enter 22120-22130. In protocol, select UDP. And if you want, give the rule a name, like Jamulusports:
Once you’ve done this, you’re ready to move to step 4 and connect to your Linux machine to install Jamulus!
Step 4: Connect to Linux and Install Jamulus.
If you’ve gotten this far, you’re almost done! You will need that SSH key file you downloaded upon creation.
Now, if you have a Windows computer, open the program PowerShell. Otherwise on Mac/Linux, open your terminal and enter the below command, substituting <private key path> and <public IP address> for the complete path to your SSH key you downloaded (get it via file properties) and the public IP address of your Linux machine, which you will see if you click on your machine in portal.azure.com under public IP address.
ssh -i <private key path> azureuser@<public IP address>
Your command could look like this:
ssh -i "C:\users\brian\downloads\jamulus_azure_key.pem" azureuser@20.42.54.163
If all goes well you will see a command prompt that has your Linux machine’s name in it, like this:
azureuser@jamulusserver:~$
Time to install Jamulus! Like I said, we barely have to do anything in this command prompt.
First type this and press enter:
wget https://worldjam.vip/jamulus/setup-jamulus.sh
Then this:
chmod 744 setup-jamulus.sh
And finally, this:
./setup-jamulus.sh
This last command runs a program that gets the latest version of Jamulus and installs it on your server according to your preferences. When you’ve answered all the questions and its done running (you will know because you will see azureuser@jamulusserver:~$ again), you can close the window and connect to your brand new server on the Jamulus client program!
Note: Your server may take a moment to appear in the Jamulus server list. Until then, use the IP address to join your server via Jamulus.
Credits
Many thanks to Simon Tomlinson for his great explanation of how this works on AWS, and his great setup script!