DIY Smarthome with ESP8266 and Node-Red
#raspberrypi #arduino #ESP8266 #nodered Start with the Sensors
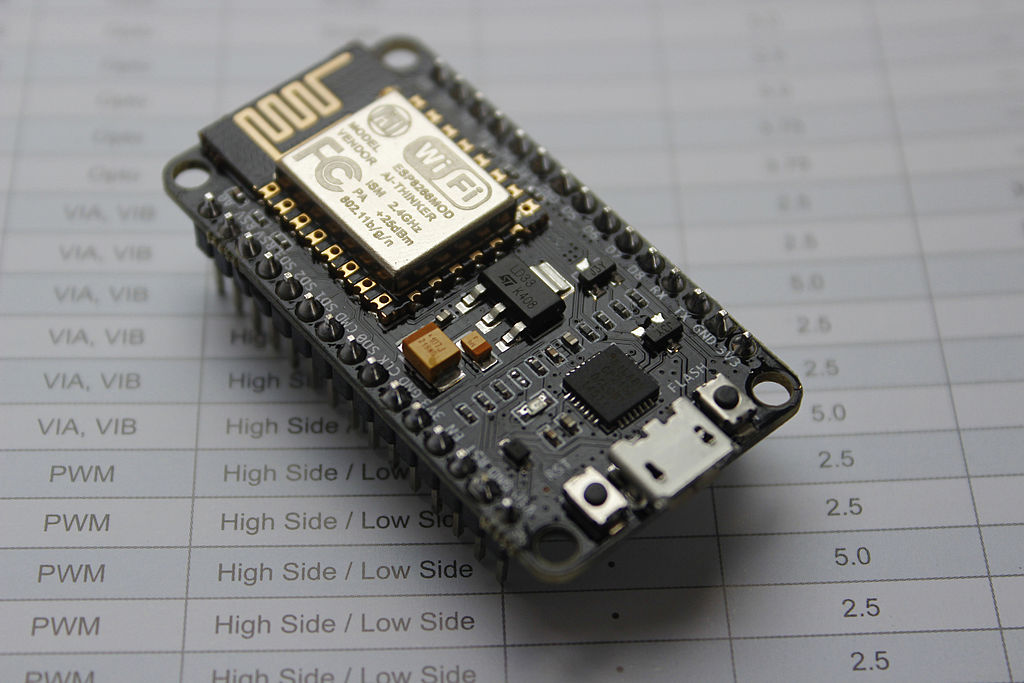
To build a sensor dashboard accessible from the internet, the first step is getting your sensor connected to the internet. This can be done with a microcontroller like the wifi board in the picture below:
Once you’ve wired your sensor to the board, you can program the board with the Arduino IDE to read these sensor values and send them over the internet to a place where your dashboard can access them. Using the MQTT protocol, you can publish data at regular intervals to a so-called MQTT broker, which is a server that receives messages published by sensors and forwards them onward to any programs that have subscribed to the topic the message was published to. You can run an MQTT server on a Raspberry Pi using Mosquitto or use free online services like cloudMQTT.
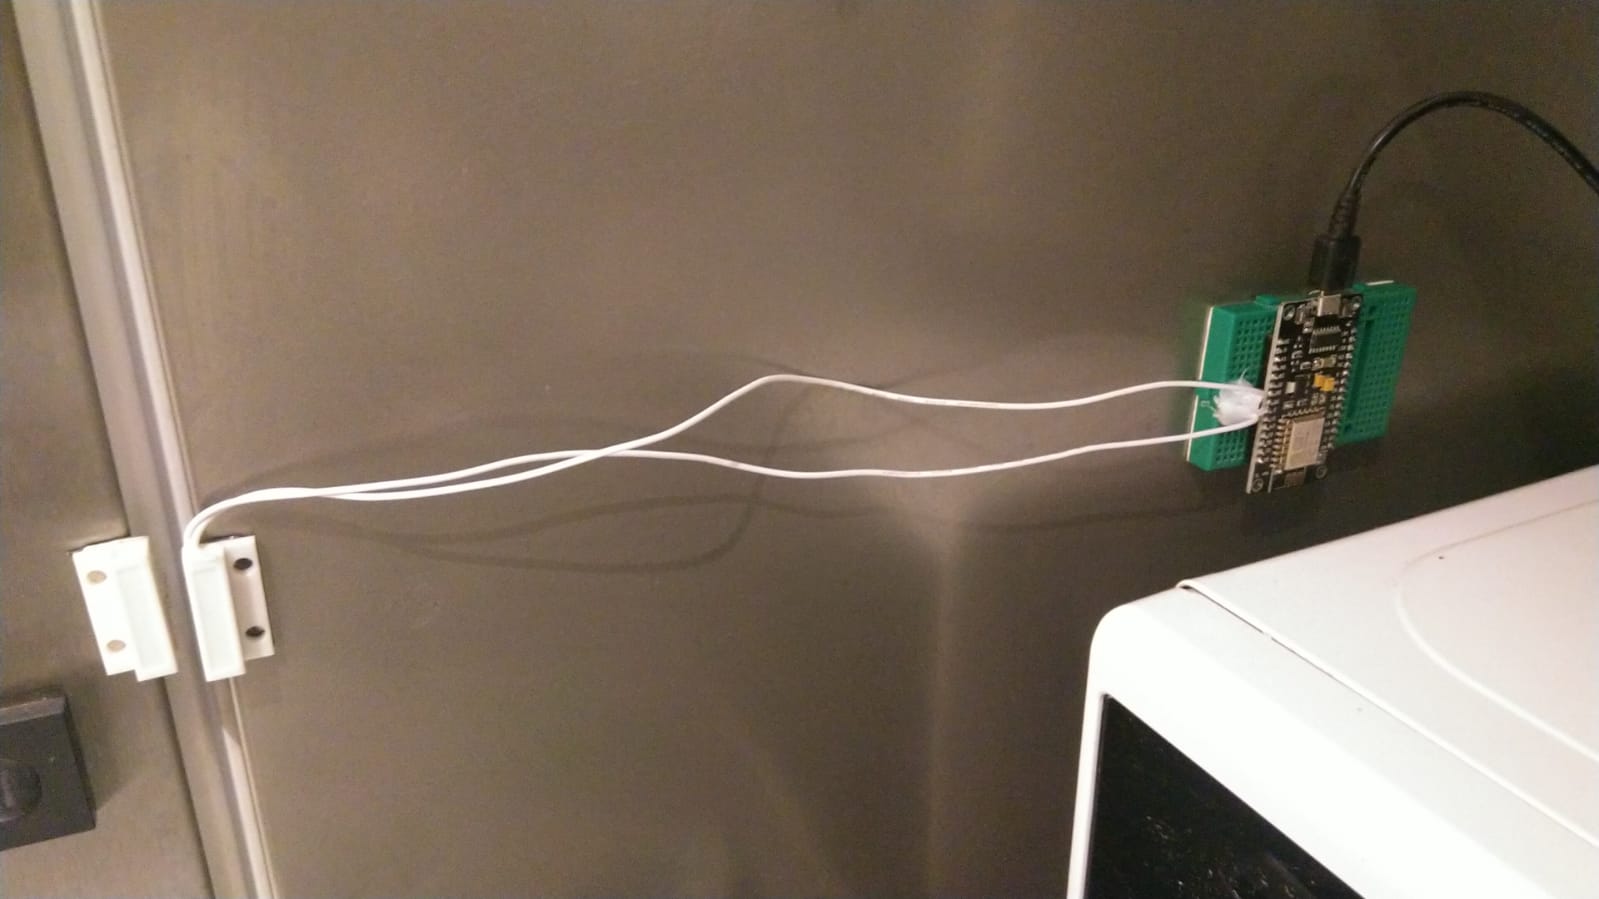
Set up a few different sensors around the house connected to ESPs, and program them all to publish their readings to your MQTT broker.
Receiving Sensor Data, Generating the Dashboard
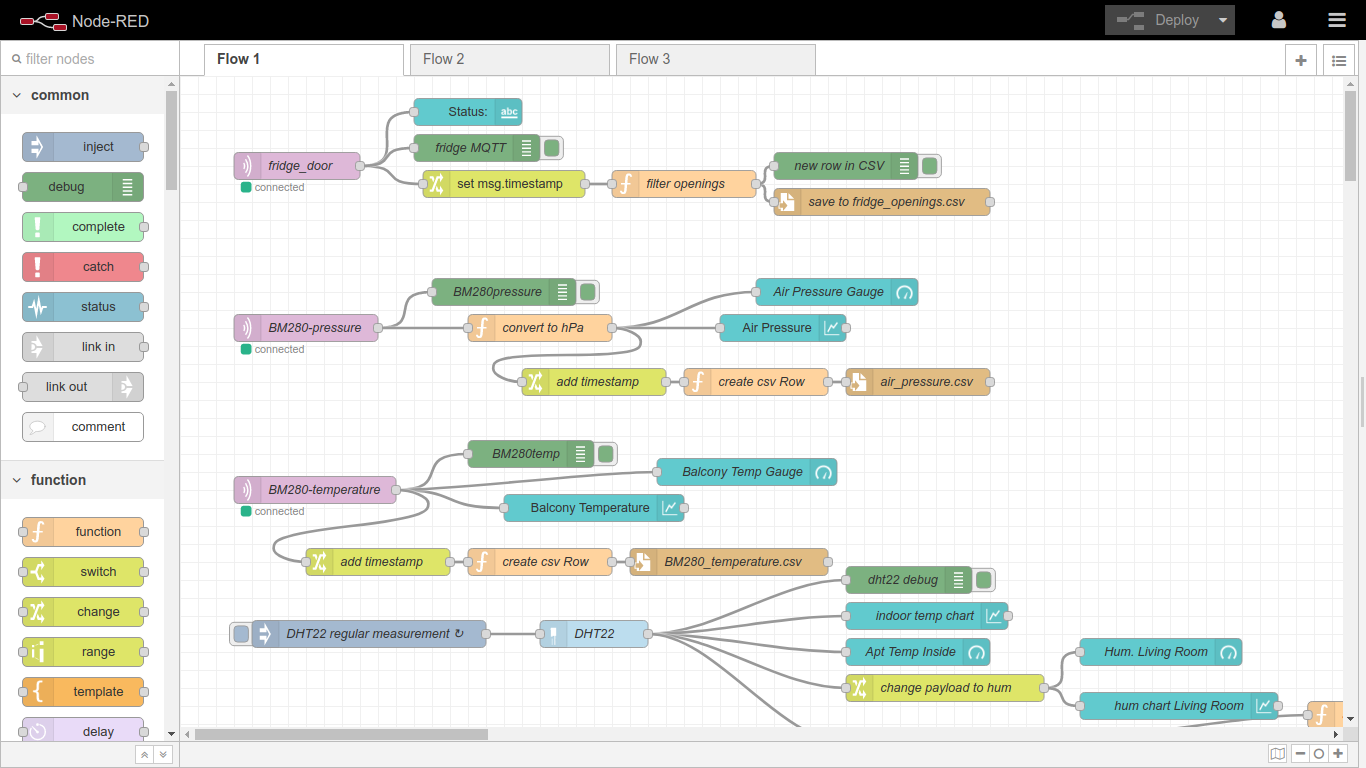
With the open-source low-code programming suite Nodered running on a server of your choice, you can easily subscribe to an unlimited number of MQTT topics and perform actions based on the input you receive.
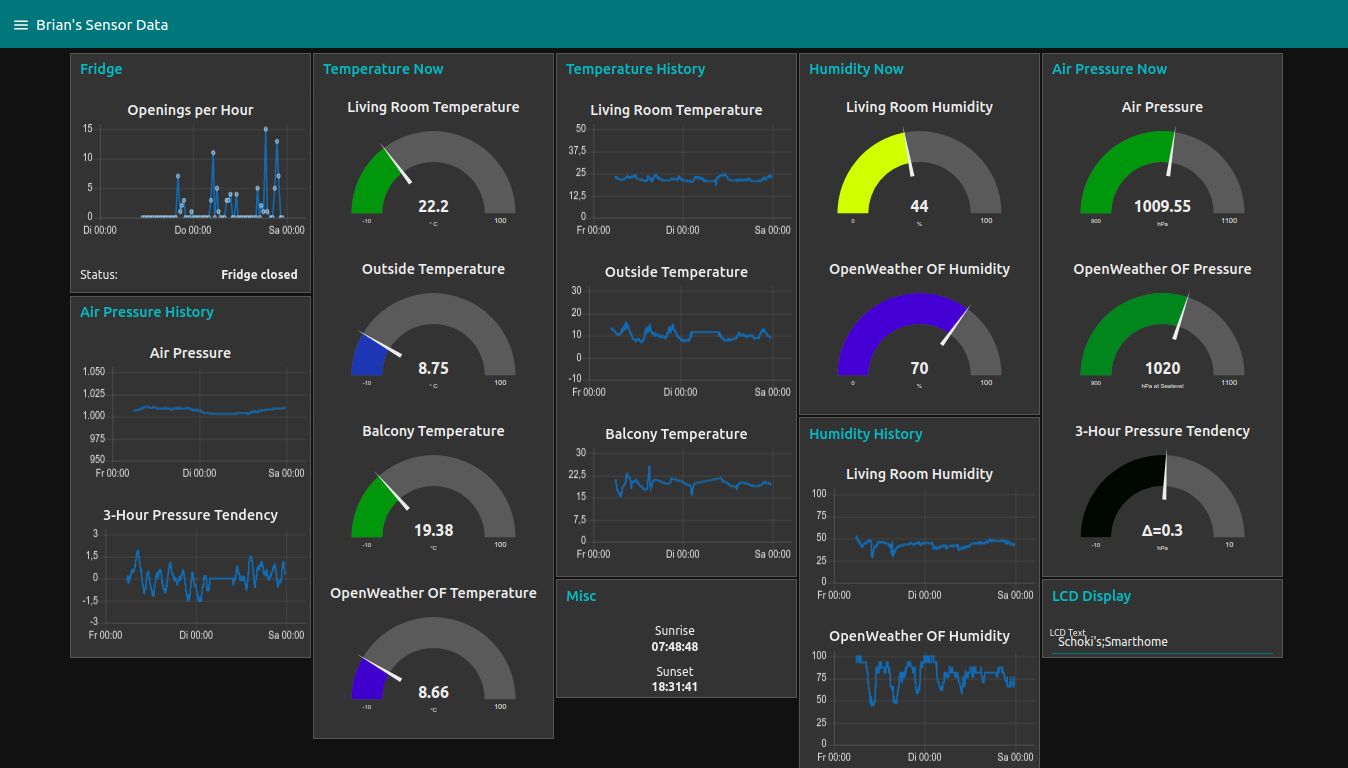
After installing the node-red-dashboard package for Nodered, you can implement all sorts of charts and gauges on a website for displaying the values from your wifi sensors.